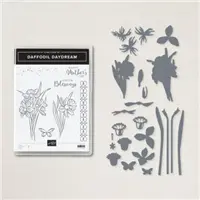
I can’t help it. Everywhere I turn there are daffodil pictures. But must admit that I have the garden catalogs out. Dreaming about the day when these sunny flowers pop up in the spring. So when I saw the Daffodil Daydream bundle in the Stampin’ Up! January-June Mini Catalog I had to have it.
I shall start us off today with a poem by A.A. Milne called ‘Daffodowndilly’
She wore her yellow sun-bonnet, She wore her greenest gown; She turned to the south wind and curtsied up and down. She turned to the sunlight and shook her yellow head, and whispered to her neighbour: “Winter is Dead.”
Don’t you just love the title of the poem? Daffodowndilly is a word that brings a smile to my whole face.
Here is my first-ever slim-line card.

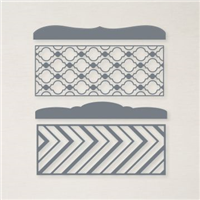
The Slim Card Dies make the background panel a breeze to create.

SUPPLIES & MEASUREMENTS
- PAPER
- Thick Basic White cardstock
- 8-1/2″ x 7″ scored at 3-1/2″ (finished card = 3-1/2″ x 8-1/2″)
- 3-3/8″ x 8-3/8″ panel behind die-cut
- 1″ x 3-1/2″ for sentiment
- Pool Party cardstock: 3-1/2″ x 8-1/2″ for die-cutting background
- Flowering Fields Designer Series Paper (DSP): for die-cutting leaves
- Daffodil Delight cardstock: for die-cutting daffodils
- Bumblebee cardstock: for die-cutting daffodils
- Thick Basic White cardstock
- BUNDLE

- DIES
- Slim Line Dies
- INKS & MARKERS
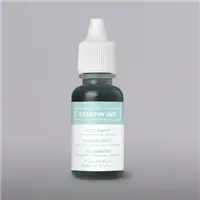
- Pool Party ink pad & reinker
- Bumblebee ink pad
- OTHER SUPPLIES
- Water Painter
- Adhesives
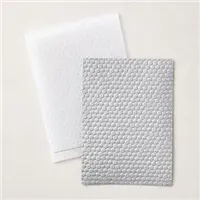
- Hive 3D Embossing Folder
- Rhinestone Basic Jewels
- Blending Brushes
- TOOLS
- Cut & Emboss Machine
- Paper Trimmer & Snips
- Bone Folder
PIECES & PARTS
BACKGROUND
- Stamp the daffodil images all over the Pool Party panel using the Pool Party ink.
- Die-cut the chevron panel from the stamped Pool Party panel.
- Use Blending Brush to add light touch of Pool Party on Basic White panel.
- Flick Pool Party Reinker onto Basic White panel using the Water Painter. TIP: Add a couple drops of reinker onto an acrylic block and dip Water Painter into water then pick up the color to flick. Tap Water Painter on you opposite, if needed, to get a good flick.
- Adhere the chevron panel to the white panel.
DAFFODILS & FOLIAGE
- Die-cut the leaves and stems from the green shaded Flowering Fields DSP.
- Die-cut lots of daffodil parts from Bumblebee and Daffodil Delight cardstock. OPTIONAL: Use the Daffodil Afternoon DSP to die-cut some of the daffodil parts.
- Assemble daffodils as shown.


SENTIMENT
- On 1″ x 3-1/2″ Basic White strip, stamp the sentiment from the Daffodil Daydream stamp set using Bumblebee ink.
- Flick a little Pool Pary ink on the sentiment panel.
- Emboss a couple of the extra thicker strips from the die-cut background using the Hive Embossing Folder.
- Layer the panels as shown.
ASSEMBLY
- Add a Dimensional behind the ‘cup’ part of the daffodil. Everything else is adhered with Multipurpose Liquid Glue.
- Sprinkle clear sequins or rhinestones around daffodil bouquet for a little bling. (because Moms like bling!)
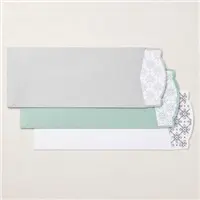
THE ENVELOPE
How do I mail this beautiful work of art? You have 3 choices
- Purchase the NEW Slimeline Envelopes from the Mini January-June 2022 Catalog. You get 15 envelopes with inside printed designs: 5 each of 3 colors (Soft Succulent, white, Smoky Slate). Envelope size is 3-7/8″ x 8-7/8″.

- Make your own using 12″ x12″ cardstock or DSP
- Cut to 9-1/8″ x 12″
- Score along 9-1/8″ side at 2″ and 6-1/8″
- Score along 12″ side at 1-5/8″ and 11″
- Fold and burnish along all score lines
- Cut out each of the corner flaps
- OPTIONAL: Cut an angle into the center section. Make sure angles meet in a nice point when folding left and right side in toward center.
- Use Tean-n-Tape to adhere long sides together, then bring up the bottom center flap
- Round the corners of the top closure
- Use adhesive to close envelope before sending
- Use a standard #10 business envelope
I prefer to use the Stampin’ Up! envelopes or make my own. Why? Because the envleopes feel so smooth. The Stampin’ Up! envelopes feel like smooth silk. They set the tone for the joy of the handmade card within.
BONUS

Purchase the Daffodil Daydream Bundle and you can get the coordinating Daffodil Afternoon DSP for FREE. Add the Slim Line Dies and you can get even more FREE gifts. Contact me and I will help you get the most out of your crafting dollar.
Tomorrow is the InKing Royal Blog Hop. I have several cards to share using the FREE Daffodil Afternoon DSP. And I know there will be lots of awesome creative projects using the FREE Sale-a-bration products. See ya tomorrow!


You have made me need the daffodil bundle!
You definitely need the daffodil bundle. It is a stash-buster. I would love to share how to maximize the value of this bundle. Contact me for more info.
Love your card! Love all of the interesting texture of your background using such fabulous slim line dies. The daffodils are perfect – beautiful card!
Thank you so much for the kind comment. I am enjoying the daffodils and they can be created out of DSP scraps with interesting outcomes.
Very pretty card. May look at this one again. Thought that i have too many flowers already, but twist my arm
I know what you mean. But daffodils are the bomb!
Love your card. Great first slim line. You might get addicted! How did I miss there were slim Lind dies? Slim line envelopes?
Thanks, and yes, they might be addicting. You missed the slimline dies and envelopes because they were on pages 52-53 of the Jan-Jun Mini catalog.