I am so inspired by the prolific photos of strawberries. So I decided that today is CASE Day for the Sweet Strawberry Bundle.
It all started with my dear friend, Lisa Padgett. She posted all the buckets of strawberries that she had picked in Virginia. Then she made a scrapbook page to keep her strawberry bumper crop pictures and recipes. Now I was inspired but wanted to see more Sweet Strawberry Bundle projects. You can see Lisa’s strawberry post here.
In comes the Stampin’ Up! Artisan, Tami Hewlett. Be still my heart. I had to CASE her card. You can see Tami’s card here. I learned a new technique for stamping the strawberry – watercolor stamping. And that was fun and oh so easy. No two will ever be alike. Just like real strawberries!
Here is my CASE of Tami’s card. I substituted several products from her original but the layout is the same.

COLOR INSPIRATION
MEASUREMENTS & SUPPLIES
- PAPER
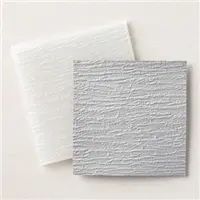
- Thick Basic White cardstock
- 4-14″ x 11″ scored at 5-1/2″
- (2) 3-3/4″ x 5″ for layering panel & message insert
- scraps for stamping images
- Balmy Blue cardstock
- 3-3/4″ x 5″ will be torn
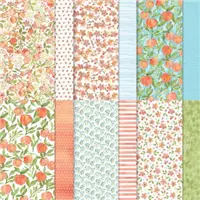
- In Good Taste
- You’re a Peach
- 3-1/2″ x 4-3/4″
- Forever Gold Laser-Cut Specialty Paper (retired)
- hexagon frame with foliage plus smaller fronds
- Thick Basic White cardstock
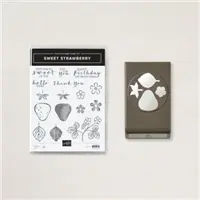
- STAMP/DIE BUNDLE
- Sweet Strawberry bundle
- DIES & EMBOSSING FOLDERS
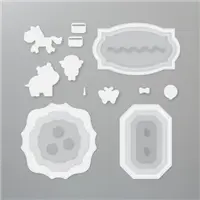
- Happy Hippo dies
- OPTIONAL: Forever Flourishing dies
- Tasteful Textile embossing folder
- Bark embossing folder
- INKS & MARKERS
- Balmy Blue ink pad
- Real Red ink pad
- Old Olive ink pad
- White Craft ink pad
- OTHER SUPPLIES
- White embossing powder
- Red Rhinestones
- White Linen Thread (5 – 9″ pieces)
- Dimensionals, Glue Dots, Multipurpose Liquid Glue
- TOOLS
- Heat Tool
- Bone Folder
- Snips
- Paper Trimmer
- Take Your Pick Tool
- Water Painter
CREATING PIECES & PARTS
Background
Let’s add some dimension to our striped card panel. Drag the Balmy Blue ink pad gently across the Balmy Blue cardstock piece. TIP: BE light-handed here. You are not looking to put a lot of color on the paper.
Emboss the cardstock with the Tasteful Textile embossing folder. Tear the cardstock toward you with the inked side up. TIP: Tearing the cardstock toward you will leave a graduated edge. Stampin’ Up! cardstock is solid core and can be separated for a subtle felted look.
Adhere the torn embossed Balmy Blue cardstock to the striped card panel.
Base Layer
Cut a frame from the Stitched Shapes or Happy Hippo dies. Use a dark wood grain paper from the In Good Taste Designer Series Paper stack. Emboss this shape with the Bark embossing folder.
Using the hexagon frame from the Forever Gold Laser-Cut Specialty Paper, layer the Bark embossed shape over the hexagon. TIP: Flipping the gold over exposes a white side. You can ink the white side to add color (and increase the uses) to a future project.

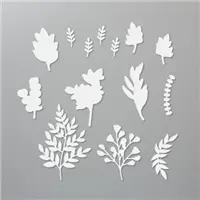
Strawberries & Leaves (2-Step Stamping)
Let’s do a little 2-step stamping. Start with the ‘fill’ stamp for the strawberries and leaves. Ink the stamp with Real Red or Old Olive ink. Then brush over the inked stamp with clear water and a Water Painter to give a watercolor effect to the image. Stamp image onto Thick Basic White cardstock. Do this several times. Remember to always make extras for customizing the message insert and the envelope.
After the images dry, stamp the coordinating detailed stamp over the ‘fill’ stamped image. Then use the Strawberry Builder punch to punch out the images. TIP: Put the punch on a flat surface so you can see the paper. Use the Take Your Pick Tool to align the smaller pieces then press the punch. Be careful not to pinch your hand.
Assemble the Strawberries and leaves. Add 3 Dimensionals behind one strawberry.

Flowers
Stamp the flowers onto Thick Basic White cardstock with White Craft Ink and heat emboss with white embossing powder. 3 large flowers and 4 small flowers were used for this card (Don’t forget to customize a message panel for the inside of the card.)
Add some Balmy Blue ink with a Water Painter. TIP: Use very little water and a quick swipe to prevent pock-marking the paper.
The smaller flower can be punched using the Strawberry Builder punch and the larger flower can be punched with the Small Blossom punch (retired) or fussy cut.
Add a Dimensional to one small blossom
Bow
This cluster or strawberries and leaves just screams for a white organic bow. I think you could do either a double bow using the White Crinkle Seam Binding or White Linen Thread. I stripped the linen threads from a thicker woven linen thread from my retired pile. Combine 5 threads (about 9″ long) and tie a bow. Attach the bow to the card using 2 glue dots for extra hold. Trim the ends.

Assembly
Layer as shown and add some Red Rhinestones. Customize the envelope and the inside message insert for extra special goodness.

I do not always add a sentiment to my cards. When I am ready to send them out, they will get a sentiment that is appropriate for the occasion.
And here is the complete package – card, envelope, and message insert. All customized and coordinated!

I hope that you enjoyed my Case Day and the Sweetest Strawberry Bundle. Can you see how you could use the cluster as a scrapbook page element? Do you need any of the supplies for this project? I would love to be your Stampin’ Up! Demonstrator and Creative Collaborator. Head over to my SHOP! It’s open 24/7 for you.


Really pretty!
Thank you so very much.
Your card is stunning!!!!
Thanks, Michelle. Are you going to CASE my CASE?