When you need some inspiration the challenges and sketches are perfect jumping in (or off) points. I have been admiring the CAS(E) this sketch! group for clean and simple cards and decided to give it a try. Here is my card …

And here is the sketch that inspired me – CAS(E) This Sketch #347 (It is a RETRO sketch).

I had to stay my hand quite a bit here. CAS means ‘clean and simple’. Yikes! Keeping the design to one layer is challenging for me. However, I am happy with the outcome.
To create the night sky background, I cut a square from a thin piece of scrap vellum for a stencil. I chose thin vellum because vellum is transparent which makes it easier to align. I also created a mask for the log cabin from the Still Scenes stamp set. I covered the cabin/tree and then placed my square stencil over the image. The sky is blended with Pool Party, Bermuda Bay and Night of Navy. Layering the colors from light to dark. Then I removed the stencil/mask and used a Night of Navy Stampin’ Marker to fill in the white space around the cabin/tree.
MEASUREMENTS (Supplies and Links are at the end)
- Whisper Thick Cardstock: 4-1/4″ x 11″ scored at 5-1/2″ plus scraps for sentiment
- Whisper Thick Cardstock: 4″ x 5-1/4″ for card panel plus scrap for sentiment
PREPARE THE BACKGROUND (use any die-cutting and embossing machine)
- Die-cut a square from thin translucent paper or white copy paper using Layered Square dies. It is better to have something you can see through for alignment.
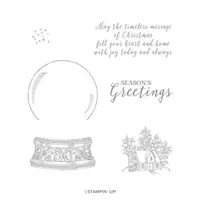
- Color directly on the cabin/tree stamp using Early Espresso and Mossy Meadow Stampin’ Markers. Stamp image onto the Whisper White card panel and again on a post-it (make sure the post-it is not super sticky).
- Fussy cut the post-it stamped cabin/tree/shrubs close. I did not include the bare branch trees.
- Place the square mask over the stamped image and secure with low tack tape (like washi or delicate surface painters tape).
- Blend Pool Party, Bermuda Bay and Night of Navy ink using a sponge or blending tool. Start with light color and bring the color into the square. Be careful not to move the mask over the cabin/tree.
- Remove the masks and fill in any white space with a Night of Navy or Basic Gray Stampin’ Write Marker.
") Creating the Stencil
Creating the Stencil") Securing the Stencil & Mask
Securing the Stencil & Mask") Blending Light to Dark Ink
Blending Light to Dark Ink") Oops forgot to mask shrub
Oops forgot to mask shrub") Finishing Touches
Finishing Touches
FINISHING TOUCHES & ASSEMBLY
- Darken some of the tree/shrub branches with Mossy Meadow Stampin’ Write marker.
- Add Shimmery Crystal to tree and shrubs. Sprinkle with Ice Glitter. Let dry
- Add Shimmery Crystal Effects to the roof of the cabin.
- Stamp sentiment. Cut ‘fishtail’ end and add Dimensionals.
- Add Dimensionals to the back of the card panel and adhere layers to the card base.
I hope you enjoyed this card. Please check out the CAS(e) this sketch. Playing along and had so much fun. I mean, really, playing in my studio? “Throw me in that briar patch.” (quote from Brer Rabbit).
Consider subscribing to receive an email when new content is published on the MurrayStampsInk.com site. The link to subscribe in the right-hand column.
I appreciate your time and comments. I read every comment and enjoy your feedback.
Placing an order today? If you are placing an order for $150 or more, I want you to enjoy all of the Host Rewards you have earned. If your order is less than $150, Please add the Host Code JTPXJ2JE when prompted. I use the accumulated Stampin’ Rewards to purchase gifts for my customers and team.
Thank you! If you do not currently have a Stampin’ Up! Demonstrator, I would love to work with you. Contact me.
Do Something Creative Every Day,


Love this card. It is absolutely striking.
Thank you, Pamela. The masking technique is so rewarding on the finished project.
Jaw. On. Floor. This card is absolutely stunning, Ann! I love everything about it. There are lots of elements and technique, but the end result is still so clean and simple. ♥
OK, you bring tears to my eyes with your compliment. Thank you!
This is a knockout! Gorgeous card!
Thank you, Linda. Your kind comment means alot.
Love the simple sophistication of this card.
Thank you.