Welcome to our Scrapbook Page Blog Hop. This month we are showcasing pages inspired by seasonal themes. My pages will be focused on Halloween. I have a list of photos that I want to be sure to capture to include on my 8″ x 8″ Halloween pages.
- Pumpkin carving with the finished product
- Group shot of grandkids costumes and maybe a couple of individual shots
- Treats (decorated table and spooky foods)
So here are my 4 pages (I am going to stick to 4 pages for the holiday! – LOL)

To create these pages I started with Stampin’ Up! Designer Series Paper. I used Magic in This Night and Peony Garden. Here are the different designs in each of those collections. And the best part is that they are both on SALE during the month of October.


LET’S GET STARTED …

- Cut an 8″ x 8″ page from Peony Garden Designer Series Paper.
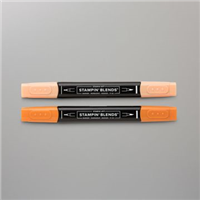
- Use Pumpkin Pie Stampin’ Blends to flick ink over page. TIP: Use the brush end and flick it using the inside of the cap.
- Die-cut ‘Halloween‘ from Basic Black cardstock backed with Adhesive Sheet using Word Wishes dies.
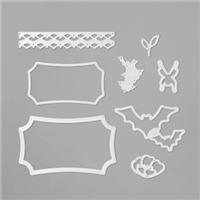
- Die-cut 8 bats from Basic Black cardstock using the Halloween Magic dies. ALTERNATIVE: Use Black Glitter Paper.
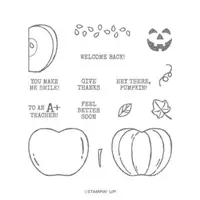
- Stamp pumpkins using Harvest Hellos stamp set on Pumpkin Pie cardstock.
- Punch out Pumpkins using the Apple Builder punch.
- Sponge edges with Pumpkin Pie and Cajun Craze ink.
- Punch out stem from Early Espresso cardstock using the Apple Builder punch.
- Die-cut a wreath from Mossy Meadow cardstock using Wreath Builder dies.
- Add Dimensionals behind one of the pumpkins and one of the bats before layering.
- Stamp sentiment 2x with white craft ink and heat emboss with white embossing powder then fussy cut.
- Punch out ‘gravestone’ from Smoky Slate cardstock with Story Label punch. Sponge lightly with Memento Tuxedo Black ink.
- Trim Basic Black cardstock for photo frames. Photo frames are 3-1/4″ x 4-1/4″ to accommodate 3″ x 4″ photos.
- Layer as shown using Multipurpose Liquid Glue, Glue Dots, or Stampin’ Seal +.

- Cut 8″ x 8″ Pumpkin Pie cardstock.
- Cut 4″ x 8″ strip from Peony Garden Designer Series paper. Strip leftover from 1st page works well here.
- Layer as shown.
- Flick with Pumpkin Pie Stampin’ Blends.
- Cut 4-5 random strips of Magic in This Night Designer Series paper.
- Punch out ‘gravestones’ from Smoky Slate cardstock with Story Label, Timeless Labels, and Everyday Labels punches. Sponge lightly with Memento Tuxedo Black ink.
- Emboss a 2-1/2″ x 6″ piece of Vellum with the Cobwebs 3D embossing folder.
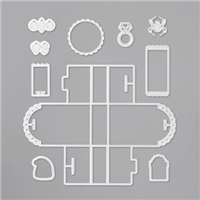
- Die-cut 2 spiders from Basic Black using the Little Treats dies. I love the embossed detail on the spider.
- Trim Basic Black cardstock for photo frames. Photo frame is 3-1/4″ x 4-1/4″ to accommodate 3″ x 4″ photo.
- Die-cut numbers from Playful Alphabet dies and Magic in This Night Designer Series paper.
- Add bat
- Use a length of black ribbon to cover the seam.


- Cut 2 – 8″ x 8″ pieces of Magic in This Night Designer Series paper. (This is my favorite pattern)
- Trim Basic Black cardstock for photo frames. Photo frames are 4-1/4″ x 6-1/4″ to accommodate 4″ x 6″ photos and 1-7/8 square for 1-5/8″ spotlighting photos. TIP: I used the Layering Squares dies.
- Fussy cut image from Magic in This Night Designer Series paper and lightly sponge with Memento Tuxedo Black ink.
- Cut a 3/4″ strip of Magic in This Night Designer Series paper and trim end with Banners Pick A Punch.
- Add bats and a spider.
- Punch out ‘gravestone’ from Smoky Slate cardstock with Story Label punch. Sponge lightly with Memento Tuxedo Black ink.
I have 6 beautiful grandchildren and will be spending Halloween with them this year. My pages are ready and I can’t wait to see the kids and start taking photos. Are you ready for the next treat?

Here is the Scrapbook Page Blog Hop list. If you get lost, come back and start again. Our theme for November is layering with the Designer Series paper.
- Ann Murray at Murray Stamps INK (YOU ARE HERE)
- S. Kelli McConkey at Inky Hands Warm Hearts
- Lisa Padgett at Crafting Hugs