
Hello, welcome to the Scrapbook Page Blog Hop! This month our theme is the “Summer Fun”. The Design Team is showcasing our scrapbook creations and we welcome your comments and participation in future Blog Hops. If you do not have a blog, please join us on our Facebook page. Share your scrapbook layouts with us and our community of Stampin’ Up! Scrapbookers. We know you will love this month’s layouts as much as we do! At the end of my post, you will find the full line-up below to help you “hop” along.
I created a 2-page 8″ x 8″ scrapbook page layout for the 4th of July Celebration. I left room for 3 photos. A large 5″ x 5″ group photo and 2 smaller 3-1/4″ x 3-1/4″ candid photos. I may end up adding 2 more pages to accommodate the candid photos, but we will see how many turned out.


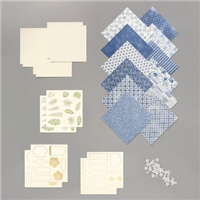
SUPPLIES
- Whisper White cardstock: 8″ x 8″ (2)
- Boho Indigo patterned paper: 6″ x 6″
- Real Red cardstock: 6-1/4″ x 6-1/4″
- Adhesive Sheets: 3″ x 6″ (2)
- For banners and stripes:
- Whisper White cardstock: 3″ x 6″
- Real Red and Night of Navy: 1/8″ to 3/16″ strips about 6″ long
- Real Red and Boho Indigo patterned paper same as 6″ x 6″ frame: 1″x 3″ strips
- Night of Navy and Real Red cardstock: 4″ x 4-1/2″ for photo frames
- Whisper White cardstock: 3-1/2″ x 4-1/4″ for photo frame backing
- Real Red cardstock: scraps for stars
- Stitched Stars dies: small stitched star and plain stars from swirly star die
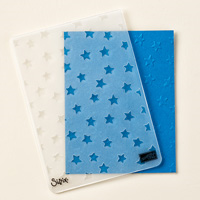
- Lucky Stars embossing folder (Retired SU)
- Sweet Silhouettes dies: dandelion
- Playful Alphabet dies
- Banner Triple punch
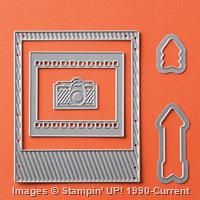
- On Film dies (Retired SU)
- Tasteful Labels dies: small fishtail banner
CREATING THE STRIPED ELEMENTS
- Apply Adhesive sheet to 3″ x 6″ Whisper White.
- Add Another Adhesive sheet on top of Whisper White.
- Remove protective backing and add alternating strips of Night of Navy and Real Red cardstock.
- Die-cut letter/numbers and dandelion from adhesive-backed striped cardstock.
CREATING THE BANNERS
- Run Real Red 1″ x 3″ strips through Lucky Stars embossing folder.
- Use Triple punch to fish tail ends of Real Red and Boho Indigo patterned paper.
- Layer embossed Real Red banner on top of Boho Indigo patterned paper banner.
- Make 5.
PHOTO FRAMES
- Layer Boho Indigo 6″ x 6″ patterned paper on Real Red 6-1/4″ x 6-1/4″ cardstock. This is sized for a 5″ x 5″ photo.
- Die-cut 2 ‘Polaroid’ frames from Night of Navy and Real Red.
- Apply Whisper White 3-1/2″ x 4-1/4″ cardstock to ‘Polaroid’ frames. Only put adhesive on the bottom edge. The 3-1/4″ x 3-1/4″ photo will side in between the white backing and the frame. Secure after adding photos.
- Die-cut small stitched banner from Tasteful Labels dies and apply to the bottom of the frame.
OTHER ELEMENTS
- Die-cut stars from Real Red cardstock using the Stitched Stars dies.
- Apply the stars in clusters of 3 and arrange in a visual triangle pattern.
To coordinate an additional 2-page layout
- Die-cut several more striped dandelions and stars.
- Consider using 3″ x 3″ photos and frames in Night of Navy and Real Red.
ASSEMBLE
Assemble the pages as shown.
I like to leave a 1/2″ border around each of the pages. It gives the pages a common margin and a feeling of cohesiveness. It also gives the eye a rest so that the photos take center stage.
Another thing that I like to keep in mind is the visual triangle. I place the title words and the star clusters in a visual triangle pattern to keep the eye moving through the pages.
You now have a 2-page scrapbook layout for the 4th of July Celebration photos in your gallery. The square size makes it easy to print photos from your Instagram or social media sites. Enjoy your summer! See you in August.
I hope you enjoyed this scrapbook layout. Our next Scrapbook Layout Blog Hop will be August 4th. The theme is ‘Special Occasions’. Please hop on over to Lisa Padgett at Crafting Hugs for more Scrapbook layouts.


I love how you’ve created the sparkler/fireworks. These are great layouts – the Polaroid frames are great! ♥
Thanks, Brian. I am thinking that the Poppy Moments inside would make good fireworks too!