I am not sure that the designers at Stampin’ Up! were thinking about the piano solo by Edward MacDowell when they named this stamp set To A Wild Rose. However, listening to the music I can just imagine walking through the roses. The air is softly scented with the perfume of blooming wild roses…the bees are gently circling the flowers and pulling the sweet nectar…why heck, there are even blue skies and soft breezes in my imagination…
There are 2 reasons why this set is so special
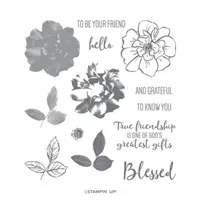
(1) The To A Wild Rose is a Distinktive stamp. Distinktive stamps start with a photograph which our amazing Stampin’ Up! manufacturing team in Kanab, Utah then turns into a photorealistic stamp! There is a lot of WOW POWER in these stamps.
(2) When a demonstrator reaches $1million dollars in sales they get to work with the concept artists at Stampin’ Up! to design a stamp set. To A Wild Rose was inspired by Mary Ellen Byler of Middlefield, Ohio.
Here are some of my cards using the To A Wild Rose stamp set


")
HOW TO CREATE THE CARDS
MEASUREMENTS
- Thick Whisper card base – 5-1/2″ x 8-1/2″, scored and folded at 4-1/4″
- Thick Very Vanilla card base (2) – 5-1/2″ x 8-1/2″, scored and folded at 4-1/4″
- So Saffron & Terracotta Tile layer – 3-5/8″ x 4-7/8″
- Crumb Cake layer (2) – 3-3/4″ x 5″
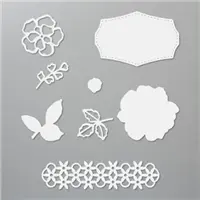
I stamped the rose and leaves outline on cardstock. For the roses, stamp a 2nd generation stamp of the filler and a fully inked stamp of the highlight. For the leaves, stamp both the filler and the highlight with a fully inked stamp. Die cut the images.
ASSEMBLY
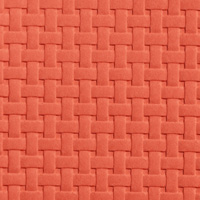
Card 1: Emboss a Crumb Cake panel with the Basket Weave folder. Lightly ink a sponge and wipe over the ‘basket’ to give image visual depth. Add linen thread to back of rose (use a little transparent tape to hold it if necessary) and add Dimensionals. Layer leaves and rose. Layer on So Saffron Cardstock and then onto Crumb Cake Card.
Card 2: Position front of Whisper White Card in Basket Weave embossing folder and run through embossing. Trim 1-1/4″ off embossed 5-1/2″ side after embossing one side of the card (save for future project). Add ribbon to cut edge using Tear & Tape. Layer leaves and rose. I did not use Dimensionals.
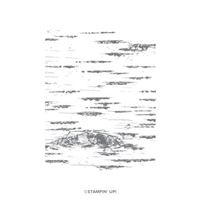
Card 3: Stamp Birch Background. Distress edges lightly with Crumb Cake ink and sponge. Layer roses and leaves. Use Dimensionals as desired. Stamp sentiment on Very Vanilla and cut using Stitched Nested Labels. Tie a bow with the Braided Linen Ribbon and attach with Glue Dot.
Placing an order today? If you are placing an order for $150 or more, I want you to enjoy all of the Host Rewards you have earned. If your order is less than $150, Please add the Host Code for the month when prompted. I use the accumulated Stampin’ Rewards to purchase gifts for my customers and team.
Thank you! If you do not currently have a Stampin’ Up! Demonstrator, I would love to work with you. Contact me.
Do Something Creative Every Day,

SUPPLIES (Click on any product to SHOP ONLINE 24/7)
Stampin’ Up! is developing a new improved embossing machine. Until it is released I am using a Big Shot for embossing and die cutting.