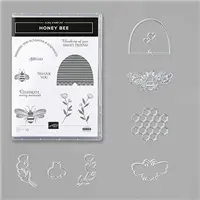
I am so glad that you buzzed in for Day 3 of Bee Week because I really do care about you. This is an encouragement card using the honey bee bundle. There are so many friends that need love, prayers, and caring that this bee card just designed itself. If you are reading this and need a little prayer, know that I am sending you prayer-filled thoughts.
BEE FACTOID: Honey bees communicate with one another by dancing. So, if that doesn’t put pictures in your head and make you giggle, I don’t know what will. I just flashed ‘Hammer-time’ with bees. I can’t unsee it!
- If you missed Day 1 of Bee Week, you can view it HERE.
- If you missed Day 2 of Bee Week, you can view it HERE.
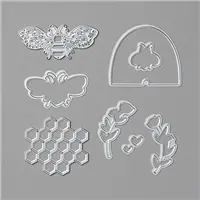
Here is my card for Day 3 of Bee Week using this bundle of products.

Honey Bee card layout with 3 front panels
MEASUREMENTS (Supplies and Links are at the end)
- Whisper White Thick Cardstock: 4-1/4″ x 11″ scored at 5-1/2″ plus 2-3/4″ x 2-3/4″ for stamping bees
- Gold Foil Sheets: 3-15/16″ x 5-6/16″
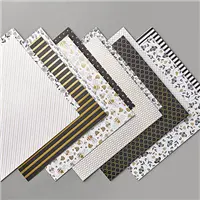
- DSP: 3-3/4″ x 5″ plus
- Coordinating DSP for Stitched Rectangle panels: (3x) 1-1/2″ x 2-3/4″
- Basic Black Cardstock: scrap for sentiment plus 2-3/4″ x 2-3/4″ backing bee die-cuts
ASSEMBLY (use any die-cutting and embossing machine)
- Adhere the Thick Whisper White and Basic Black squares together. TIP: layering 2 cardstocks makes the die-cut more rigid and dimensional. Use Adhesive sheets or lots of single-layer adhesive tape.
- Stamp Queen bee and 2 small bees in Memento Black.
- Stamp sentiment 2x with Versamark on Basic Black cardstock and heat emboss with Gold Embossing Powder.
- Snip each line of the sentiment apart. HINT: The 2nd stamped sentiment makes it easier to cut the sentiment apart. Cut the top, then bottom from one. Then cut the middle out of the other.
- Color bee body with Daffodil Delight Blend or Stampin’ Write Marker. Then go over stripes yellow stripes with Wink of Stella.
- Adhere the Stitched Rectangles to the card front.
- Put a Black Dimensional behind the bee.
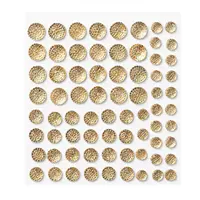
- Assemble card layers as it pleases you. Use glue dots behind the sentiment. Add Gold Faceted Gems.
- Grab a Whisper White Envelope or a Gold Foil Edged envelope and add some decorative stamping. I used a die-cut of the queen bee and attached it to the envelope with a thin layer of liquid glue.
Come back tomorrow for another Bee Week creation using the Honey Bee Bundle.
JOIN STAMPIN’ UP! TODAY
During Sale-a-bration there are super incentives for JOINING Stampin’ UP! as a demonstrator. I would love for you to be part of my team. Join between January 3rd – March 31, 2020 and in addition to the usual Starter Kit $125 worth of products for just $99, you will get a new exclusive Mini Paper Cutter (6″ guillotine), 6″ x 6″ Designer Series Paper sampler, and your choice of any stamp set offered in the current catalogs. And we will throw in some business supplies. AND you will get FREE SHIPPING. All this for $99. Sound like a great idea to you? Make a list and contact me. I will help you get the MOST for your $$.
Placing an order today? If you are placing an order for $150 or more, I want you to enjoy all of the Host Rewards you have earned. If your order is less than $150, Please add the Host Code for the month when prompted. I use the accumulated Stampin’ Rewards to purchase gifts for my customers and team.
Thank you! If you do not currently have a Stampin’ Up! Demonstrator, I would love to work with you. Contact me.
Do Something Creative Every Day,


Adore all these bee-utiful cards!
Thank you – I am really having fun with the bees.
I ♥ Bee Week, and I ♥ this card. What a stunner!
Thanks, Brian…It Bee a Good Week. LOL