I learned a new word today, estivate. It’s like hibernating but warmer. My new answer to what I am doing this summer is, “Why it’s a time to estivate with my family this summer. How about you?”
Estivate is the summer equivalent to hibernate. Instead of resting through the winter with lower metabolism activity, animals that ‘estivate’ sleep through the warmer months. For humans, estivate can also refer to those that spend the summer in one place.
Want to learn more? Merriam-Webster definition
And how does that relate to paper crafting with Stampin’ Up!? Well, I am estivating. Are you? And as a result am feeling rather summery but not so sleepy. So, I created a staycation kind-of card.

Isn’t this a fun happy card?
- Thick Whisper White cardstock:
- 4-1/4″ x 11″ scored at 5-1/2″ for card base
- 2-1/2″ x 5″ for stamping and die-cutting drinks
- Whisper White cardstock: 4″ x 5-1/4″ message card insert
- Basic Black cardstock:
- 4″ x 5-1/4″ frame
- scraps for sentiment
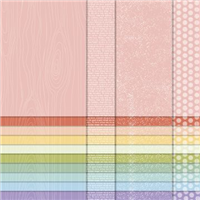
- Subtle 6″ x 6″ Patterned paper: 3-3/4″ x 5″
- In Good Taste DSP: 3″ x 4-1/2″ for die-cutting stitched frame
- June 2020 Paper Pumpkin die-cut
Stamp the Good Morning Magnolia image onto the vellum panel using Basic Gray ink. The lines will be blurred by the Stampin’ Blends and the alcohol to create a faux watercolor effect.
Color the image starting with the lightest color. Use Dark Daffodil Delight for the center. Dip a fine-tip paintbrush into the rubbing alcohol and gently move the color. I added Champagne Shimmer Paint to my rubbing alcohol.
Next, color non-adjacent petals with Dark Flirty Flamingo. Gently blur the stamped line. Let dry and repeat on other petals. Do the same for the leaves. TIP: Blow into a straw to gently direct the ink flow in the desired direction.
Add a second layer of color after the image is dry. Repeat the process of alcohol painting and gently blowing the ink.
OPTIONAL: Pick up some clean rubbing alcohol with the paintbrush and flick it over the image. This will create small droplets that will lighten some areas by moving the color outward.
Adhere the vellum panel to the Basic White cardstock panel using Stampin’ Seal or a light amount of Multipurpose Liquid Glue. Add to Basic Black card base.
Stamp the sentiment in White Craft ink and heat emboss with with embossing powder. Trim to you liking. Add to card panel with small black Dimensionals.
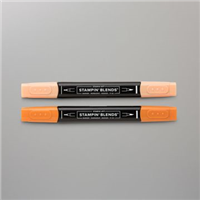
Customize the message insert and the envelope with some flicks of color from the brush end of the Stampin’ Blends.
Background
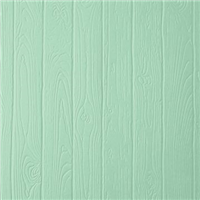
- Emboss Balmy Blue woodgrain patterned paper with 3D Pinewood embossing folder. TIP: Spritz with list mist of water. Damp paper stretches better when embossing.
- Layer on Basic Black.
Frame
- Layer 2 of the stitched rectangle frames and die-cut. The outside measurement of my frame is 2-5/8″ x 4″.
Pineapple
- Use the pineapple die-cut from the June 2020 Paper Pumpkin kit.
- Spritz with water and emboss with the Detailed Diamond embossing folder. TIP: This folder has a lot of detail and thinner paper of the pineapple may stick. Use the pick from the Take Your Pick tool to gently pry off the embossing folder.
Beverages
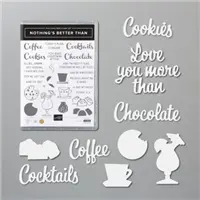
- Stamp 3 or 4 beverage glasses from the Nothing’s Better Than stamp set on Whisper White using Basic Gray ink.
- Die-cut beverage glasses using the coordinating dies.
- Using Stampin’ Blends add appropriate beverage colors. I used Calypso Coral, Pool Party, Granny Apple Green, Flirty Flamingo, Daffodil Yellow, Mango Melody, Pumpkin Pie, and Smoky Slate.
Sentiment
- Add all the sentiments desired from the Nothing’s Better Than stamp set to the Stamparatus.
- Stamp the sentiments on Basic Black with Whisper White Craft Ink and heat emboss with white embossing powder.
- Fussy cut into strips. TIP: If you want the ends to all to be equal, then after you cut the strips line up the sentiment on your Trimmer and pick a spot. Cut. Flip the sentiment and line up in the same spot and cut. I just eye-ball it on these cards but when I want precision that is my method.
ASSEMBLY
- Layer as shown.
- OPTIONAL: Add a couple of loops of gold metallic thread behind one of the beverages.
- Use Dimensionals behind the beverages.
- Cut black Mini-Dimensionals in half and use behind the sentiment strips.
- Add some stamping and a beverage glass to the card insert. I added some stamped images using the Pattern Play stamp set behind the beverage die-cut here.
- Add some coordinating patterned paper to the envelope flap.

Who says you have to estivate in a cave. LOL! Enjoy your summer days. Let’s estivate this summer. (I am having way too much fun with this word!)
Let’s Get Super Excited
- You can order from my shop 24/7 or contact me anytime with questions.
- Leave me a comment. I’d love to hear from you.
- What did you like?
- What would you like to see more of?
- Need help implementing a technique? Ask me and I will see what I can do.
- HOST a WORKSHOP or CLASS? Contact me to get on the schedule. I will design a workshop based on your desires.
- JOIN MY TEAM Purchasing the $99 Starter Kit is one of the BEST DECISIONS EVER!
- Visit my PROJECT GALLERY for more paper crafting inspiration.
- Subscribe to PAPER PUMPKIN and get a different creative kit every month.
- SUBSCRIBE TO MY BLOG NOW!
- Ask me how to get your FREE catalog.
I CAN SHOW YOU HOW TO TAKE YOUR CARDMAKING & SCRAPBOOKING TO THE NEXT LEVEL.


I love your fun happy card. With the colors used and layout it made me smile, A happy card.
Thank you! There is so much to be joyful for even as we estivate. 🙂
What a cute card, Ann. I love the colors and the design with the great sentiment. Enjoy your day!
Thank you, Hilda. You have an awesome day too.