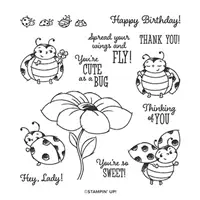
I may have a ladybug obsession. I am finding inspiration for ladybug projects all over the place. It is hard not to LOVE this stamp set and coordinating dies. This is a very limited time release (until March 31, 2020 or until supplies last) and you can have it FREE. Host a workshop (in-person) or catalog and have a $300 order total. And you can also purchase the coordinating dies. I would be happy to help you in any way that I can. Contact me or add a comment to this post to learn more. Don’t wait if you want this set.
DID YOU KNOW…There is an officially recognized fear of Ladybugs (Ladybirds) known as Coccinellidaephobia. This forms part of a wider fear called Entomophobia which is a known fear of one or more insect varieties. If you ever win a point on Trivia Night for this obscure data, you can thank me. LOL!
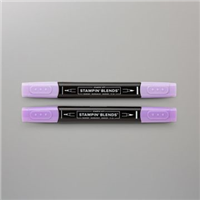
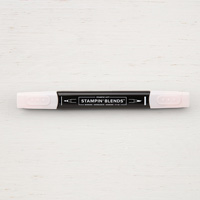
HERE IS MY COLOR INSPIRATION
NOW LET”S LOOK AT THE LAYOUT OR SKETCH
Let’s start with 2 basic shapes: a rectangle and a circle. I placed my focal image (ladybug and florals) along the long line of the rectangle. Remember the Rule of Thirds? (click HERE to see that post) The focal image makes up the vertical axis and the sentiment is along the horizontal axis.

MEASUREMENTS (Supplies and Links are at the end)
- Thick Whisper White Cardstock: 4-1/4″ x 11″ scored at 5-1/2″ plus scrap for ladybug
- Whisper White Thick Cardstock: 3-3/4″ x 5″, plus scrap for die-cut flower bunch
- Black Cardstock: 3-1/2″ x 3-1/2″ to die-cut, plus scrap for sentiment
- Bird Ballad DSP: 3-1/2″ x 4-3/4″ to die-cut panel
- Fluid 100 Watercolor Paper: 5″ x 7″
- Gorgeous Grape and Granny Apple Green Cardstock: scraps for die-cutting florals
CREATING THE PIECES AND PARTS (use any die-cutting and embossing machine)
- Stamp sentiment from Honey Bee stamp set on black cardstock with white craft ink, heat emboss with white embossing powder and fussy cut.
- Stamp ladybug with Tuxedo Memento Black ink, heat emboss with clear (or black) embossing powder and die-cut image using Ladybugs dies. I used clear.
- Color your ladybug with Stampin’ Blends. I used HIghland Heather (light/dark), Daffodil Delight (light/dark) and light Pink Pirouette or light Petal Pink or Ivory
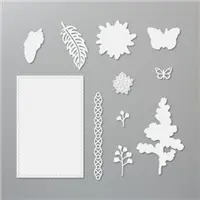
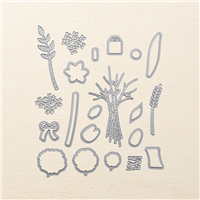
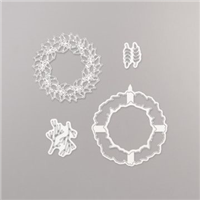
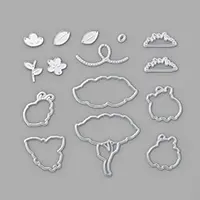
- Die-cut florals and foliage from Bouquet Bunch and All Around Wreath dies. I used Whisper White, Gorgeous Grape and Granny Apple Green.
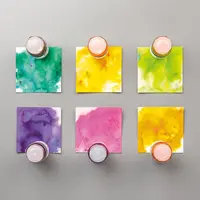
- Using Gorgeous Grape Pigment Sprinkles, create a watercolor solution. Make one dark and one light. Paint a plaid background on the watercolor paper alternating between light/dark and thick/thin lines.
- Die-cut a circle from the ‘plaid watercolor’ and scallop circle from the black cardstock.
- Use the Natures Thoughts die to die-cut the Bird Ballad DSP panel. TIP: The yellow print is directional. So decide how you want the ‘bird feet’ to work with your layout.
ASSEMBLE CARD
- Add Dimensionals behind ladybug, larger flower and sentiment.
- Use liquid glue (and a tweezer) to adhere the foliage around the ladybug.
- Layer as it pleases you.
- Add some Basic Pearls to the flower centers.
- Using a Granny Apple Green dark Stampin’ Blend, color some white baker’s twine. Tie a bow and adhere with a rolled glue dot.
- Grab a Whisper White envelope and add some decorative stamping or cut some coordinating DSP for the envelope flap.
- Don’t forget to make an inside panel for your message. Cut a 4″ x 5-1/4″ Whisper White cardstock panel, stamp a sentiment and adhere to the inside of the card.
TIME-SAVING TIP
Generally, I make 3-5 card fronts of the same design in 3-3/4″ x 5″ without sentiments. I keep these on hand to make quick cards. It is easy to …
- grab a card base, card front and sentiment
- choose a coordinating cardstock to layer (optional)
- adhere them all together
- add a note to the inside and
- quickly stamp an envelope
OR
- make a tag
- adorn a gift bag or box
- traded with friends
- added to a customer’s order as a thank you
- placed in a frame
- made into a banner
- …you get the idea …
JOIN STAMPIN’ UP! TODAY
During Sale-a-bration there are super incentives for JOINING Stampin’ UP! as a demonstrator. I would love for you to be part of my team. Join between January 3rd – March 31, 2020 and in addition to the usual Starter Kit $125 worth of products for just $99, you will get a new exclusive Mini Paper Cutter (6″ guillotine), 6″ x 6″ Designer Series Paper sampler, and your choice of any stamp set offered in the current catalogs. And we will throw in some business supplies. AND you will get FREE SHIPPING. All this for $99. Sound like a great idea to you? Make a list and contact me. I will help you get the MOST for your $$. AND that’s not all, you get at least 20% off on all your future orders. BEST DECISION EVER!
Placing an order today? If you are placing an order for $150 or more, I want you to enjoy all of the Host Rewards you have earned. If your order is less than $150, Please add the Host Code for the month when prompted. I use the accumulated Stampin’ Rewards to purchase gifts for my customers and team.
Thank you for joining the Birthday Celebration InKing Royalty’s Blog Hop! If you do not currently have a Stampin’ Up! Demonstrator, I would love to work with you. Contact me.
Do Something Creative Every Day,
SUPPLIES (Click on any product to SHOP ONLINE 24/7)