More ladybug obsession. I just can’t help myself. I am giving them personalities in my dreams. They are mixing with other stamp sets and taking on a life of their own. I am being overrun with ladybugs and it isn’t even summertime. Well, enough of my over-reacting. Here are my Ladybugs: Plain and Fancy.
Plain Card

MEASUREMENTS (Supplies and Links are at the end)
- Gorgeous Grape Cardstock: 4-1/4″ x 11″ scored at 5-1/2″ plus scrap for ladybug
- Highland Heather Cardstock: 3-1/2″ x 5″
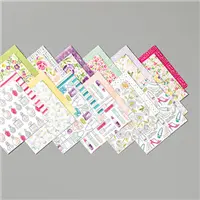
- Best Dressed DSP: 3-1/2″ x 2-1/2″ to die-cut panel
CREATING THE PIECES AND PARTS (use any die-cutting and embossing machine)
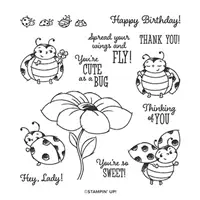
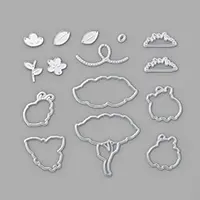
- Stamp ladybug with Tuxedo Memento Black ink, heat emboss with clear (or black) embossing powder and die-cut image using Ladybugs dies. I used clear.
- Color your ladybug with Stampin’ Blends. I used Real Red (light/dark) and light Pink Pirouette or light Petal Pink or Ivory.
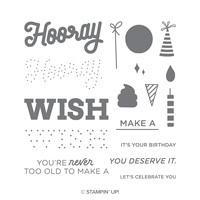
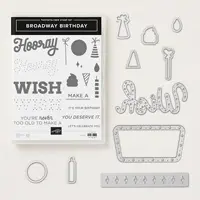
- From Broadway Birthday, stamp balloon and string then die-cut. TIP: I inked the balloon stamp with a very lightly inked (Highland Heather) sponge dauber around the edges of the balloon to give it a translucent effect.
ASSEMBLE CARD
- Add Dimensionals behind ladybug and balloon.
- Layer as it pleases you.
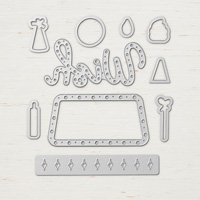
- I added some dots from die-cutting the marquee from Broadway Wished dies. You could add some small pearls, sequins or rhinestones.
- Stamp sentiment from Do The Impossible stamp set on side of panel as shown.
- Grab a Whisper White envelope and add some decorative stamping or cut some coordinating DSP for the envelope flap.
- Don’t forget to make an inside panel for your message. Cut a 4″ x 5-1/4″ Whisper White cardstock panel, stamp a sentiment and adhere to the inside of the card.
Fancy Card
Sometimes you take a photo of a card and think … I can make this really pop. I used black to help me here. The black layer panel, black & white embossed sentiment and black doodle lines around the inner panel did the trick for me.

MEASUREMENTS (Supplies and Links are at the end)
- Thick Whisper White Cardstock: 4-1/4″ x 11″ scored at 5-1/2″ plus scrap for ladybug and balloon
- Black Cardstock: 3–7/8″ x 5-1/8″ plus scrap for sentiment
- Gorgeous Grape Cardstock: 3-5/8″ x 5-1/8″
- Highland Heather Cardstock: 3-1/2″ x 5″
- Best Dressed DSP: 3-1/2″ x 2-1/2″ to die-cut panel
CREATING THE PIECES AND PARTS (use any die-cutting and embossing machine)
- Stamp sentiment from Do the Impossible stamp set on black cardstock with white craft ink, heat emboss with white embossing powder and fussy cut.
- Stamp ladybug with Tuxedo Memento Black ink, heat emboss with clear (or black) embossing powder and die-cut image using Ladybugs dies. I used clear.
- Color your ladybug with Stampin’ Blends. I used Real Red (light/dark) and light Pink Pirouette or light Petal Pink or Ivory.
- From Broadway Birthday, stamp balloon and string then die-cut. TIP: I inked the balloon stamp with a very lightly inked (Highland Heather) sponge dauber around the edges of the balloon to give it a translucent effect.
- Die-cut DSP stitched scalloped panel from Stitched So Sweetly dies.
ASSEMBLE CARD
- Add Dimensionals behind ladybug and balloon.
- Layer as it pleases you.
- I added some dots from die-cutting the marquee from Broadway Wished dies. You could add some small pearls, sequins or rhinestones.
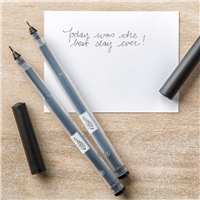
- Draw a line around the frame as shown.
- Grab a Whisper White envelope and add some decorative stamping or cut some coordinating DSP for the envelope flap.
- Don’t forget to make an inside panel for your message. Cut a 4″ x 5-1/4″ Whisper White cardstock panel, stamp a sentiment and adhere to the inside of the card.
JOIN STAMPIN’ UP! TODAY
During Sale-a-bration there are super incentives for JOINING Stampin’ UP! as a demonstrator. I would love for you to be part of my team. Join between January 3rd – March 31, 2020 and in addition to the usual Starter Kit $125 worth of products for just $99, you will get a new exclusive Mini Paper Cutter (6″ guillotine), 6″ x 6″ Designer Series Paper sampler, and your choice of any stamp set offered in the current catalogs. And we will throw in some business supplies. AND you will get FREE SHIPPING. All this for $99. Sound like a great idea to you? Make a list and contact me. I will help you get the MOST for your $$. AND that’s not all, you get at least 20% off on all your future orders. BEST DECISION EVER!
Placing an order today? If you are placing an order for $150 or more, I want you to enjoy all of the Host Rewards you have earned. If your order is less than $150, Please add the Host Code for the month when prompted. I use the accumulated Stampin’ Rewards to purchase gifts for my customers and team.
If you do not currently have a Stampin’ Up! Demonstrator, I would love to work with you. Contact me.
Do Something Creative Every Day,


Both are such great cards, Ann! I love this simple design and how you’ve showcased it with just a little more pizzazz. What a celebration!
Thanks for your kind words. Simple is so HARD.