 Welcome to InKing Royalty’s January Blog Hop! During this year’s blog hops, we are enjoying a Year of Celebrations. This month’s projects celebrate Valentine’s Day, so prepare yourself for lots of hearts and beautiful showcases of love. We are excited to share our creations with you today! After you read my post, I hope you’ll hop over to the next person on the list at the bottom of this post.
Well, of course, bees fit right into the theme of Valentine’s Day InKing Royalty’s Blog Hop. And today I am wrapping up my BEE WEEK (Like Shark Week with fewer teeth) with this puzzle inspired Valentine.
BEE FACTOID: In ancient Egypt, people paid their taxes with honey. I wonder if the IRS would accept cards as payment? Then they could send them out to all the taxpayers and brighten their day.

Expression of love using puzzle pieces and a bee
MEASUREMENTS (Supplies and Links are at the end)
- Basic Black Cardstock: 4-1/4″ x 11″ scored at 5-1/2″ and 3-3/4″ x 3-3/4″ for frame behind the puzzle
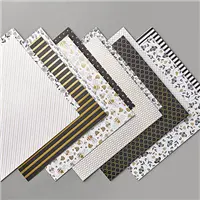
- Golden Honeybee DSP: 3-3/4″ x 3-3/4″ to die-cut puzzle (FREE During Sale-a-Bration with $50 product purchase)
- Whisper White Cardstock: 4″ x 5-1/4″ for the card front panel
- Whisper White Thick Cardstock: scrap for stamping/die-cutting sentiment puzzle piece and bee
- Gold Foil Paper: scrap to die-cut puzzle piece
- Whisper White 1/4″ Crinkled Seam Binding: length for the bow
- Gold Metallic Thread
- Black Bakers Twine (extra embellishment stash from Paper Pumpkin kits)
ASSEMBLY (use any die-cutting and embossing machine)
- Die-cut puzzle and adhere pieces to the Basic Black backing frame. Put Black Dimensionals behind the black puzzle frame.
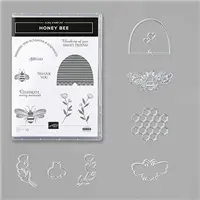
- Stamp sentiment from Love You to Pieces stamp set using Memento Tuxedo Black Ink. TIP: Use Stamparatus and apply a couple of layers of ink to make sentiment piece really black.
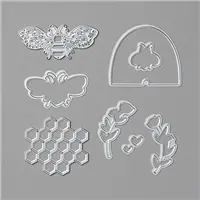
- Die-cut sentiment and a gold puzzle piece.
- Stamp small bee with Memento Tuxedo Black Ink and clear heat emboss. Die-cut bee. Add Black Dimensional.
- Assemble layers as shown.

- Wrap black twine around the lower part of the front card panel.
- Add ribbon with Glue Dot.
- Wrap Gold Metallic Thread around 3 fingers, 3 times. Add Glue Dot to the base of the wrapped thread. Use tweezers to poke thread loops behind bee.
- Grab a Whisper White envelope and add some decorative stamping or cut some coordinating DSP for the envelope flap.
- Don’t forget to make an inside panel for your message. Cut a 4″ x5-1/4″ Whisper White cardstock panel and adhere to the inside of the card. Happy Valentine’s Day!

If you missed any of the Bee Week projects, check them out by clicking on the day
 A Golden Opportunity for the honeybee |  Honey Bee Card with a circle cut-out |  Honey Bee card layout with 3 front panels |  3 Jeweled Bees with a Vintage flare |
| DAY 1 | DAY 2 | DAY 3 | DAY 4 |
 Coordinate the unexpected with First Frost and Golden Honey DSP |
Pressed Petal Banner and Embossed Card create texture for the honeybee |  Honey Bee Card with Stitched die layers |
Artist Trading Card using Honey Bee Bundle in Vintage style
|
| DAY 5 | DAY 6 | DAY 7 | BONUS – HONEY BEE ATC |


VALENTINE’S DAY BLOG HOP LINE-UP
Thank you for stopping by today! I hope you’ll buzz over to the next stop on the blog hop, Jennifer Spiller at Westside Paper Creations. There’s lots of inspiration to be found in this group – and you don’t want to miss it!
Thank you for hopping along with us. If you get stuck during the Blog Hop, please use this line-up as a guide:
- Brian King at Stamp with Brian
- Ann Murray at Murray Stamps Ink
- Jennifer Spiller at Westside Paper Creations
- Candy Ford at Stamp Candy
- Pam Morris at Tap Tap Stamp
- Julie DiMatteo at The Paper Pixie
- Sheryl Abernathy at Elegant Sentiments
- Lynn Kolcun at Avery’s Owlery
- Shawn de Oliveira at Shawn Stamps
- Jackie Beers at Blue Line Stamping
- Sue Jackson at Just Peachy Stamping
- Linda Krueger at The Stamp Coach
- Sheryl Sharp at Sharp Notes by Sheryl
JOIN STAMPIN’ UP! TODAY
During Sale-a-bration there are super incentives for JOINING Stampin’ UP! as a demonstrator. I would love for you to be part of my team. Join between January 3rd – March 31, 2020 and in addition to the usual Starter Kit $125 worth of products for just $99, you will get a new exclusive Mini Paper Cutter (6″ guillotine), 6″ x 6″ Designer Series Paper sampler, and your choice of any stamp set offered in the current catalogs. And we will throw in some business supplies. AND you will get FREE SHIPPING. All this for $99. Sound like a great idea to you? Make a list and contact me. I will help you get the MOST for your $$. AND that’s not all, you get at least 20% off on all your future orders. BEST DECISION EVER!
Placing an order today? If you are placing an order for $150 or more, I want you to enjoy all of the Host Rewards you have earned. If your order is less than $150, Please add the Host Code for the month when prompted. I use the accumulated Stampin’ Rewards to purchase gifts for my customers and team.
Thank you for joining the Valentine’s Day InKing Royalty’s Blog Hop! If you do not currently have a Stampin’ Up! Demonstrator, I would love to work with you. Contact me.
Do Something Creative Every Day,


This card stands out from the crowd. I love the non-traditional black and gold colors for Valentine’s Day. And the puzzle pieces are a perfect touch. Gorgeous!
Thanks. I wanted to stay away from the blatant hearts in pink and red. This could be a Valentine’s or just a Love you anytime card.
Just buzzzzzing by to say that I would gladly accept honey for my sales tax! Okay, that was really bad lol. Love your bee card! Xo
You must be very careful about the ‘honey’ word. Although when I lived in GA it was all about the ‘sugar’. Glad you liked the card.
Love how you’ve put all of the wonderful elements together! The gold puzzle piece is perfect, and oh you’ve caused me to put the puzzle pieces die set on my wish list!!!
Sheryl, you mean to tell me that you do not have the Puzzle Piece Dies or the stamp set. You must remedy that or I may fall to pieces. I keep thinking about Shel Silverstein’s book ‘The Missing Piece’. Such a heartwarming tale.
You are cracking me up with your Bee Factoids. Love your cards.
I have about 200 Bee Factoids. I developed a Bee Keeping Girl Scout Badge for our Council about 10 years ago. I think they still use it.
Love this with the puzzle pieces! I am so in love with this DSP and already know I am going to have to get a second pack. All of your bee cards are great, but I think this one is my favorites!
THANK YOU, Sue. I am on my 3rd package of the Golden Honey DSP. Please, Lord, stop me. Nawwww…just kidding.
I love that you used new product with old. Such a sweet card!
Thanks for your kind words. Nothing sweeter than a honeybee. 🙂
What a creative way to use the puzzle did and ghd awesome bee buzz together! All of your we creations are awesome!!! Hugs from Bama
Hey Bama, Irish eyes are smiling your way. Glad you liked this card. Hugs!
Bee week has been a blast! I love that you incorporate the puzzles here – such a great card. ♥ So glad you hopped with us today, Ann!
Thanks for the encouragement. And I am sure Bee week had nothing to do with the letter ‘B’ in Brian. LOL
So cute! I love that paper and what a great idea to use the puzzle pieces. You nailed this one!
Thank you for your kind words. And believe it or not – this was the first time I used the puzzle pieces. I will definitely do more. LOVE them.
A sweet card. I love the puzzle!
Thank you, Jackie.
So adorable, Ann! The puzzle pieces/stamps are one of my favorite sets, and combined with the honey bees puts this over the top for me.❤️
Glad to be of assistance today…LOL! I love the honeybees and am trying to pair them with all my other favorite stamp sets. I just can’t seem to get enough of them.