Today I have a different twist on the Forever Fern Suite with stenciling. I was inspired by a piece of fabric. How could I create the textured fabric with Stampin’ Up! products? It is easier than it looks. And here is my resulting card combining a gold laser-cut piece from Forever Fern and Stenciling.

The color combination makes me think of antiqued woven textiles.
- Crumb Cake cardstock: 4-1/4″ x 11″ scored at 5-1/2″
- Crumb Cake cardstock: 4-1/4″ x 5-1/2″
- Misty Moonlight cardstock: 4-1/4″ x 3/4″ for sentiment
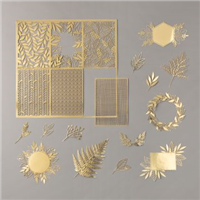
- Forever Gold Laser-cut Specialty Paper
- Very Vanilla cardstock: 4″ x 5-1/4″ for card insert
- Scrap paper to create a stenciling mask
CREATING THE BACKGROUND
- Die-cut random circles from scrap paper using the smallest circle from Circle dies.
- Select stencil from the Basic Pattern Decorative Masks.
- Set up the stack for stenciling: Crumb Cake panel, circle mask, decorative mask.
- Using a sponge wedge add Misty Moonlight ink.
- Cut panel to 3-3/4″ x 5″.
- Distress edges with Misty Moonlight ink. TIP: Lay panel on a flat surface, drag inked sponge onto the panel.
- OPTIONAL: If you have the Retired Ticket Punch, notch the 4 corners before distressing.
- Run card panel through embossing machine with the Tasteful Textile 3D embossing folder.
- Flick Night of Navy Stampin’ Marker onto the card panel. HINT: To flick, take brush end of the marker and flick it using the inside of the marker top.

ASSEMBLY
- Stamp the sentiment from the Peaceful Moments stamp set on Misty Moonlight cardstock with Versamark.
- Heat emboss the sentiment with white embossing powder.
- Attach Forever Gold laser-cut piece to card panel as shown. Trim excess and save for another project.
- Use Dimensionals behind sentiment and layer on the card panel.
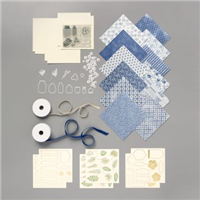
- Tie a bow with Very Vanilla/Gold ribbon from Boho Indigo Product Medley and attach it with glue dots.
- Attach entire card panel to the card base using Dimensionals.
- Add some Boho Indigo DSP to an envelope flap and a Misty Moonlight stamped/die-cut leaf to the inside message card panel.

UPDATE 7.12.2020: Here is a card I made using the ink left on the stencil/mask. Just spritz and press onto cardstock. Click here for instructions.

Let’s Get Super Excited
- You can order from my shop 24/7 or contact me anytime with questions.
- Leave me a comment. I’d love to hear from you.
- What did you like?
- What would you like to see more of?
- Need help implementing a technique? Ask me and I will see what I can do.
- HOST a WORKSHOP or CLASS? Contact me to get on the schedule. I will design a workshop based on your desires.
- JOIN MY TEAM Purchasing the $99 Starter Kit is one of the BEST DECISIONS EVER!
- Visit my PROJECT GALLERY for more paper crafting inspiration.
- Subscribe to PAPER PUMPKIN and get a different creative kit every month.
- SUBSCRIBE TO MY BLOG NOW!
- Ask me how to get your FREE catalog.
I CAN SHOW YOU HOW TO TAKE YOUR CARDMAKING & SCRAPBOOKING TO THE NEXT LEVEL.


Thanks so much for the inspiration and directions for your card, It is beautiful. I will be trying out the ideas, Enjoy your day and stamp it up,
I am so glad that you find the instructions helpful. Please post your creation on my Facebook page…Murray Stamps